3 Ways to Find Element Selector for iOS App with Appium
May 17, 2020Finding an element using selector on an IOS mobile app is the prerequisite before we can interact with the element in our automated mobile UI tests. However, due to how app content is rendered in a native iOS app, the selector we can use to locate an app element is very much different from a web browser element. In this article, we will take a look at 3 common ways to determine the element selector to find an element in an iOS app for automated mobile UI tests.
XCTest Framework & Appium XCUITest Driver
For a native iOS app, the app content is rendered via WKWebView (iOS 8.0 or later). The official XCTest framework developed by Apple offers a way to locate the element based on what each element is rendered into, in terms of its element type and element attributes in the WKWebView context. However, XCTest Framework only supports Swift and Objective-C, and therefore is not the ideal choice for many people to use for automated mobile UI testing when the iOS app is written in React Native instead of Swift.
If you are already in the world of automated mobile UI testing, you probably have already heard of or been using the alternative - Appium XCUITest Driver (formerly the UIAutomation Driver for iOS). The Appium XCUITest Driver leverages Apple's XCTest Framework and its libraries under the hood in order to facilitate automation of your iOS app, and supports a wide variety of languages, including Java, Python, javascript, Ruby, C#, and PHP. We will be using the Appium XCUITest Driver as the example to look at how we can inspect the iOS application and find element selectors.
Find Element Selector for iOS Mobile App
XCTest Framework or Appium XCUITest Driver provides a way to interact with the app element programmatically, but we still need to identify the element selectors manually and provide the selectors to our automated UI tests to interact with the elements. However, since we have to use an iOS simulator or a real iOS device to open the app, there is no built-in inspector on the device to give us those information, like it usually does with Developer Tools in various browsers. There are 3 approaches I use frequently to inspect a native iOS app content and determine the selector to locate an element.
By the way, the example iOS app we will use for demonstration is as below. It's written with React Native and running on iOS simulator.
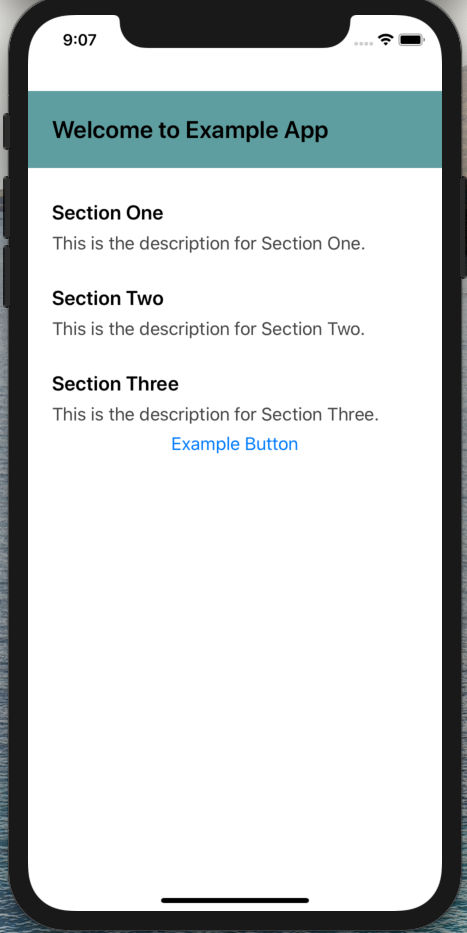
Screenshot of the example react-native app, running on iOS simulator
1. driver.getPageSource()
Appium XCUITest Driver provides a method getPageSource() to directly print out the page source of the currently rendered app page in your terminal console. It's a quick way to see a full picture of all the elements in your app page, and identify the element type and attributes you can use to construct an element selector. All you need to do is to insert the below line of code in your automated UI tests (code example in Java):
System.out.println(driver.getPageSource());Below is a snippet of the page source for the example app.
<XCUIElementTypeOther type="XCUIElementTypeOther" name="Welcome to Example App" label="Welcome to Example App" enabled="true" visible="true" x="0" y="76" width="375" height="77">
  <XCUIElementTypeStaticText type="XCUIElementTypeStaticText" value="Welcome to Example App" name="Welcome to Example App" label="Welcome to Example App" enabled="true" visible="true" x="24" y="100" width="327" height="29"/>
</XCUIElementTypeOther>
<XCUIElementTypeOther type="XCUIElementTypeOther" name="Section One This is the description for Section One." label="Section One This is the description for Section One." enabled="true" visible="true" x="0" y="184" width="375" height="55">
  <XCUIElementTypeStaticText type="XCUIElementTypeStaticText" value="Section One" name="Section One" label="Section One" enabled="true" visible="true" x="24" y="184" width="327" height="25"/>
  <XCUIElementTypeStaticText type="XCUIElementTypeStaticText" value="This is the description for Section One." name="This is the description for Section One." label="This is the description for Section One." enabled="true" visible="true" x="24" y="216" width="327" height="23"/>
</XCUIElementTypeOther>
<XCUIElementTypeOther type="XCUIElementTypeOther" name="Section Two This is the description for Section Two." label="Section Two This is the description for Section Two." enabled="true" visible="true" x="0" y="270" width="375" height="54">
  <XCUIElementTypeStaticText type="XCUIElementTypeStaticText" value="Section Two" name="Section Two" label="Section Two" enabled="true" visible="true" x="24" y="270" width="327" height="25"/>
  <XCUIElementTypeStaticText type="XCUIElementTypeStaticText" value="This is the description for Section Two." name="This is the description for Section Two." label="This is the description for Section Two." enabled="true" visible="true" x="24" y="302" width="327" height="23"/>
</XCUIElementTypeOther>
<XCUIElementTypeOther type="XCUIElementTypeOther" name="Section Three This is the description for Section Three. Example Button" label="Section Three This is the description for Section Three. Example Button" enabled="true" visible="true" x="0" y="356" width="375" height="113">
  <XCUIElementTypeStaticText type="XCUIElementTypeStaticText" value="Section Three" name="Section Three" label="Section Three" enabled="true" visible="true" x="24" y="356" width="327" height="25"/>
  <XCUIElementTypeStaticText type="XCUIElementTypeStaticText" value="This is the description for Section Three." name="This is the description for Section Three." label="This is the description for Section Three." enabled="true" visible="true" x="24" y="388" width="327" height="44"/>
  <XCUIElementTypeButton type="XCUIElementTypeButton" name="Example Button" label="Example Button" enabled="true" visible="true" x="24" y="431" width="327" height="38"/>
</XCUIElementTypeOther>
As you can see in above, the printed page source gives abundant information about each element including their type and attributes, with which we can use to determine the selector for each element. For example, for the Example Button button element, its page source is:
<XCUIElementTypeButton type="XCUIElementTypeButton" name="Example Button" label="Example Button" enabled="true" visible="true" x="24" y="431" width="327" height="38"/> </XCUIElementTypeOther>We can easily determine its element selector to be:
driver.findElement(By.xpath("//XCUIElementTypeButton[@name='Example Button']"))2. Accessibility Inspector
Accessibility Inspector is a less well known but very useful tool developed by Apple to help developers improve the accessibility of their iOS apps. The tool is bundled with Xcode and you probably already have it installed on your Mac laptop. Accessibility Inspector inspects the iOS app for its accessibility features and issues, by parsing and identifying each element on the iOS app, and checking the element's type and accessibility labels. Since it provides detailed information about each element on the app, it can easily be used to identify the selector for each element in automated UI tests as well.
Below is an example of the information provided by Accessibility Inspector for the Example Button button element:
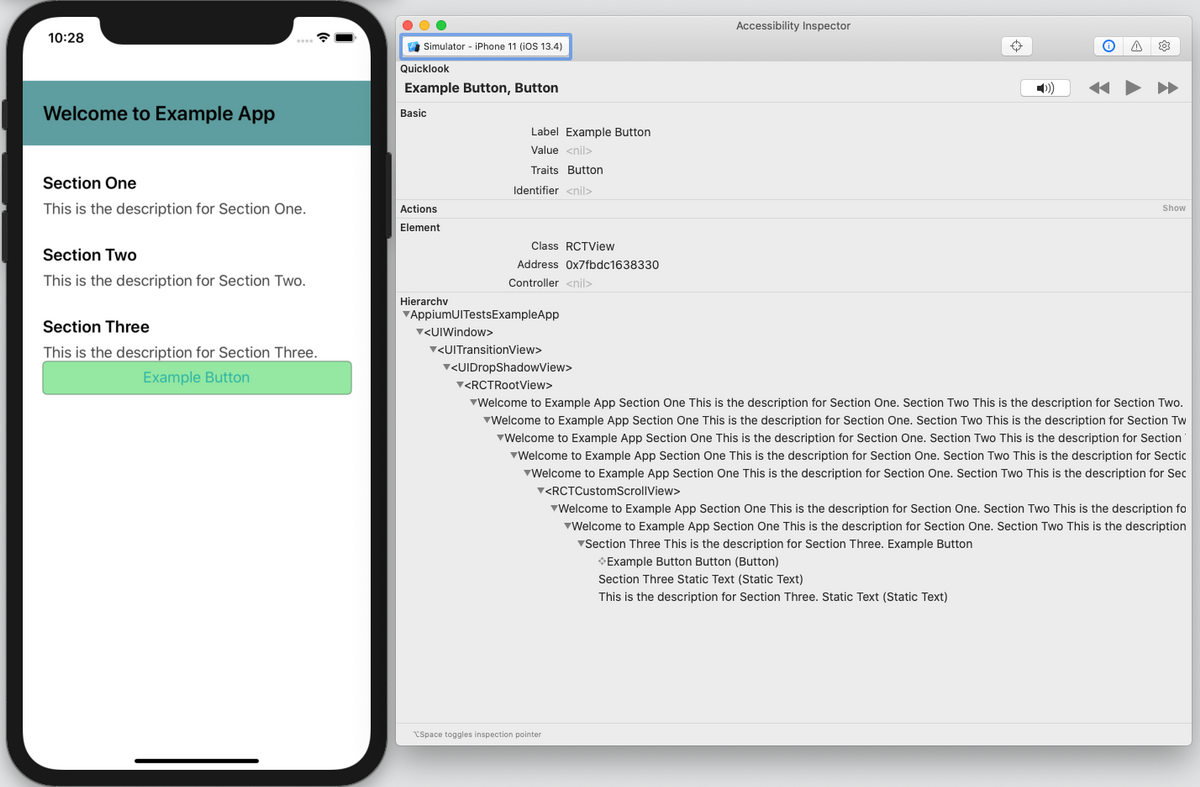
Screenshot of Example App and Accessibility Inspector
As you can see above, the Accessibility Inspector shows that the Example Button button element has Button type and Example Button label, with which we can use to determine the selector for this element as:
driver.findElement(By.xpath("//XCUIElementTypeButton[@name='Example Button']"))Accessibility Inspector is not always straightforward to use at first in terms of determining the exact element selector, but it's a quick and light-weight tool to easily get the job done once you are familiar with how Accessibility Inspector presents information about an app element.
3. Appium Desktop
Appium Desktop is a desktop app developed by Appium team for Mac, Windows, and Linux. It's a popular tool used by many Appium developers to inspect app elements for iOS app as well as Android app in their automated mobile UI tests.
Below is what Appium Desktop shows about Example Button button element:
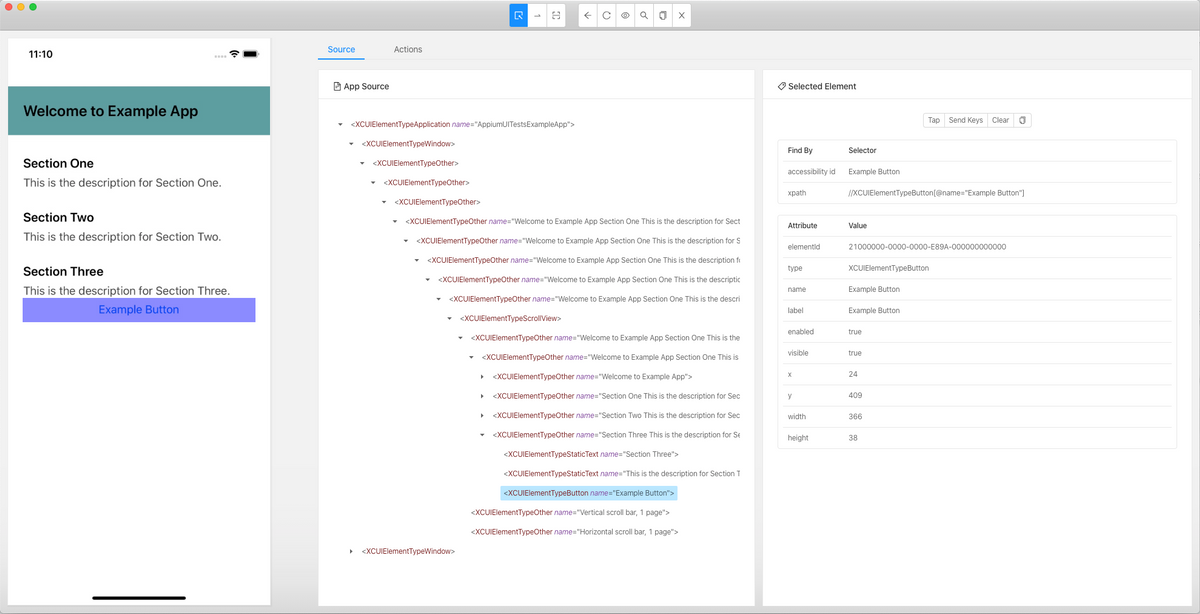
Screenshot of Example App and Appium Desktop
As you can see, it shows a full hierarchy of the current app page in the middle section App Source, and a detailed list of information and attributes in the right section Selected Element. What's more useful is that it also suggests the best selector to use to locate the current element, by accessibility id or xpath, which is very convenient to just copy and use.
Appium Desktop provides other nice features in its UI as well, such as directly clicking/tapping with the selected element, and refreshing page source after app page is changed. You can refer to the official Appium Desktop code repo for more info.
Final Words
In conclusion, Appium Desktop is a popular and recommended tool to use for inspecting app elements and determining element selectors on iOS app. It's also useful to get a full picture of your app and page elements if you just get started to write UI tests for it. Once you are fairly familiar with the app and page structure, using driver.getPageSource() in your code directly or using Accessibility Inspector is a good alternative to quickly find element selectors with light-weight effort.